Summary: The article emphasises on how to export OST to Office 365 without losing quality. It provides you information on why export and how to export. For conversion, you can choose a third-party tool or a manual solution.
OST stands for Offline Storage Table. It allows users to work offline and transfers data automatically when the connection re-establishes. An OST file can store many items like emails, contacts, calendar, events, tasks, and journals of Outlook.
Office 365 is a cloud-based utility that allows users to maintain their contacts, notes, emails, and other databases strategically. It is an advanced platform for managing day-to-day emails, contacts, and tasks.
Reasons Why Users Choose to Export from OST to MS Office 365
Several reasons can prompt users to switch from OST to MS Office 365. We have listed some important reasons that provoke users to switch from OST to MS Office 365.
- Data recovery: An OST file is vulnerable to corruption. Once an OST file becomes corrupt, it can become inaccessible. You can avoid data corruption by exporting OST . It helps you preserve your important emails, contacts, calendar events, and other data.
- Data migration: If you have a plan to switch from on-premises Exchange server to Office 365, you may need to conversion of OST.
- Access from multiple devices: OST files are device specific. You can access an OST file in a Windows application where MS Outlook is pre-installed. Office 365 is a cloud-based service the gives the flexibility to open data from anywhere. After conversion, you can access your data on multiple devices, including your desktop computer, laptop, smartphone, or tablet.
- Collaboration: Office 365 is an advanced and productive tool, It is a combination of Microsoft Word, Excel, PowerPoint, and Teams that let you collaborate with your team more effectively. Exporting your OST data to Office 365 can enable you easy share and work collaboration.
- Scalability: Office 365 is a scalable solution that updates automatically. Microsoft ensures to offer high-quality services through Office 365. You can increase the storage capacity. You can get additional features to increase work productivity. Options are limitless.
Manual Conversion of OST for Microsoft Office 365
First, we discuss manual conversion of OST Mailbox. If you find the below method helpful, you can practice it. Ensure that you are technically savvy and can handle any technical issues. It has three steps to follow.
Step-1 Convert OST Files into PST Format
There is no direct method to export OST. However, you can export PST to Office 365 manually. The first step comprises conversion of OST emails
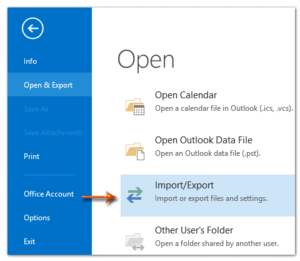
- Access your MS Outlook account and click on the File menu above > Open & Export > Import/Export.
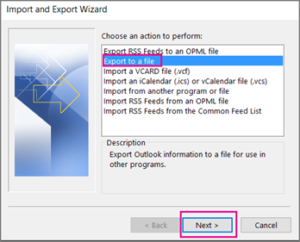
- In the Import and Export Wizard, select the ‘Export to a file’ option and press ‘Next.’
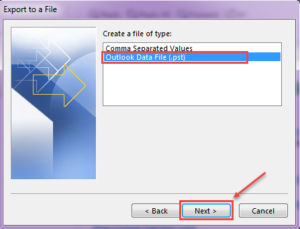
- In the Export to a File wizard, select ‘Outlook Data File (.pst)’ and click ‘Next.’
- Choose a mail account and individual mailboxes, such as ‘Inbox’ or ‘Sent Items’ or all at one time and press Next.
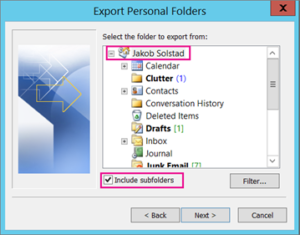
- Hit the ‘Include subfolders’ checkbox and click ‘Next.’
- After that Press the Browse tab to select a suitable location.
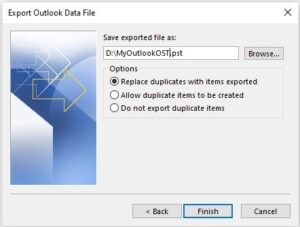
- Press the ‘Finish’ button to complete the process.
- You can secure a PST file if you want. It is an optional step to follow. Here provide the password and press OK to lock the file.
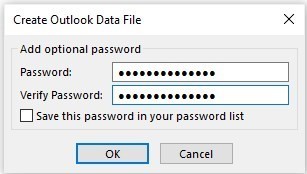
- It will start export Process
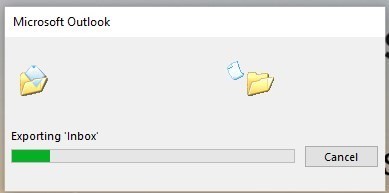
Step-2 Convert PST to Office 365
In the second method, you can use the Drive Shipping solution to copy the converted file to BitLocker-encrypted hard drive (2.5 inch) and ship the drive to a MS’s data center. It will transfer the PST data to Azure Blob storage. It is chargeable.
Read More:– Import PST to Office 365
Automated Conversion with Softaken Software
If you don’t want delay in conversion and have no technical expertise, you can choose a third-party professional program. Softaken Converter is one such application for conversion of OST in bulk. The application simplifies the conversion process. Irrespective of the OST file size, the utility can export large to small sized OST files within a few minutes. You can operate the program independently even if you are not so tech savvy. The export process takes place at fast speed.
Let’s Understand the Steps to Follow for Conversion-
- Download and launch the program on your Windows 10
- Select the OST File format from the given list and press Next
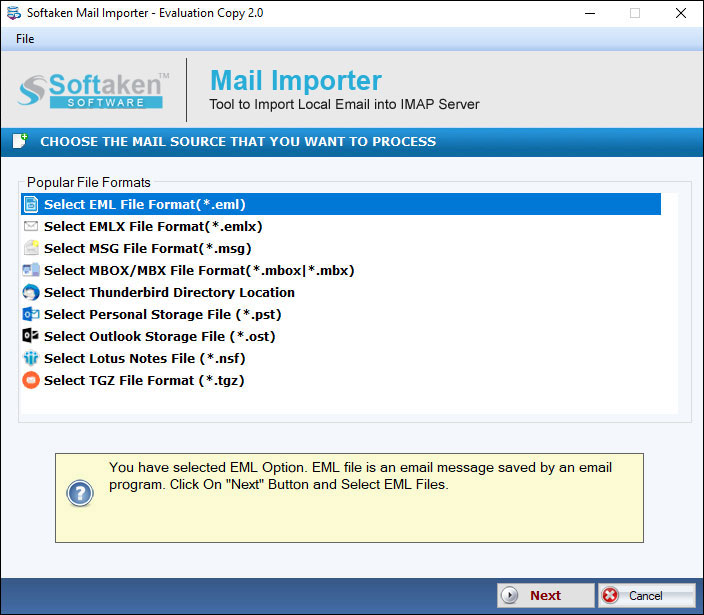
- Click on the Browse button to select locally saved OST files and press Next
- Now select Export to Office 365 option from the list and press Next
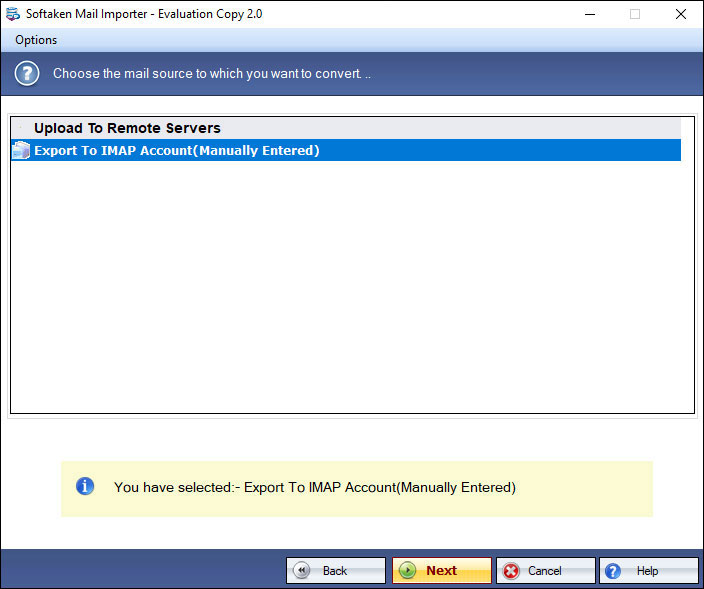
- Provide your Office 365 account password and username, hit the Authenticate User tab
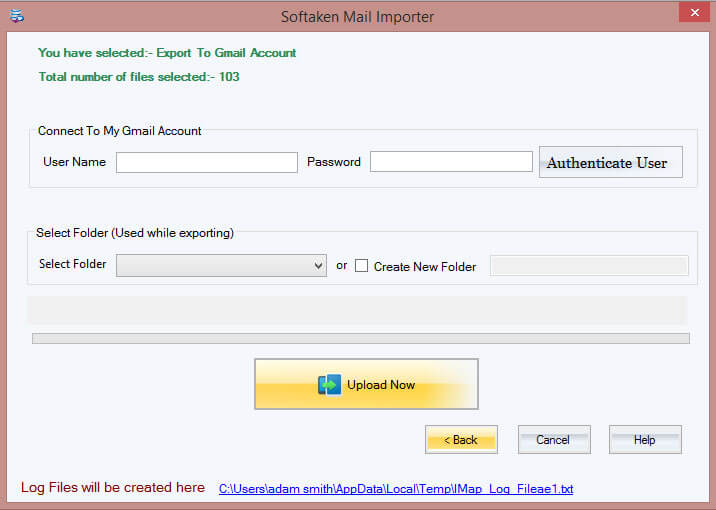
- Select the folder where you want to save data or instantly create a new folder for your Office 365.
- Press the Upload Now tab.
Conclusion
Isn’t it easy to export from OST emails to Office 365 using a third-party program? You can share your experience here about the application. Your feedback is important to us.
