Conversion goal from Gmail to Office 365 is always beneficial to users because Office 365 offers several advantages over Gmail. Gmail is a plain server-based email client, whereas Office 365 is a subscription-based email client. Office 365 is integrated with a range of advanced tools to improve users’ experience. The subscription includes Microsoft Word, Excel, Powerpoint, and MS Outlook. Owing to this reason, users like to choose Office 365 over Gmail.
The article provides manual conversion and automated ways to export from Gmail to Office 365. You have the freedom to choose either way. However, experts suggest users go with a reliable conversion program instead of manual data conversion. Manual conversion comes with several disadvantages such as data loss, risk of data hacking, and time-consuming. Let’s dig into the manual and automated conversion solutions to transfer data.
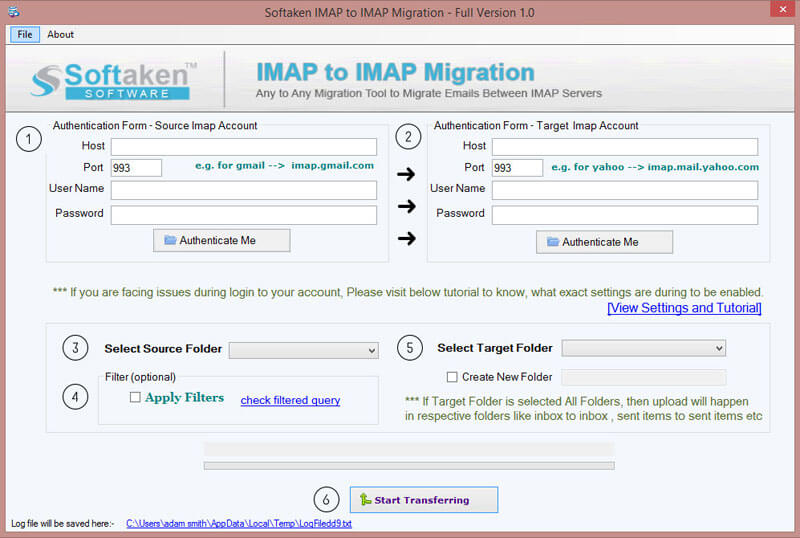
Use this Tool to Direct Transfer emails from Gmail or G Suite to Office 365

Method 1: Gmail to Office 365 Manually
Step I: For this, the initial step is verification of your domain and let let Office 365 know that you have a domain for your Gmail account.
Step II: Creating a user and adding it to Office 365
- Start the Office 365 and then the Admin Center.
- After that, press the tab Users and select Active Users
- Press the More tab and choose the Import Multiple Users option. Provide the desired Username, Display Name, Age, etc in the CSV file.
- In the Create and upload file, select the Browse button and then hit the Verify tab.
- A dialogue box will appear. Your file will appear better and then hit the Next button.
Step III: Exporting the list of Gmail mailboxes
- For this login to the G Suite admin console.
- After that, take the cursor to the Users and after that, choose the list of users in the Google admin Center.
- Get ready to verify each email address and jot them down.
- After that, login to the Office 365 admin centre and press the Users and then the Active Users.
- Now, access an Excel sheet to enter the Email address, username, password of each mailbox
- In the end, save the CSV file.
Step IV: Creating migration endpoints on Office 365
- For this, access your Exchange admin centre and then hit the Recipients tab.
- Click on the Migration and then the Migration endpoints.
- Press the New tab and then the IMAP
- It will open the IMAP migration configuration page. Provide the following details- IMAP server: imap.gmail.com Settings: default
- Now, click on the Next tab as it opens the Enter general information page. Enter the migration endpoint name on this page.
Step V: Exporting Mails
- Access Office 365 and then take the cursor to the admin centres.
- After that, press the Exchange tab and then visit the Recipients.
- Press on the Migration and the New button after that. Select the option “Migrate to Exchange Online”.
- After that, select the IMAP Migration and hit the Next button. It will open a screen there click on the Browse button.
- Look for the CSV file you have made to convert and then hit the Next tab.
- Once it is verified, Gmail mailboxes will be on display. After that, press the Next tab.
- It will open the Set the migration endpoint page and select the earlier migration endpoint and click on the Next tab
- It will next open the IMAP Migration Configuration window. Don’t interfere with the default values and press the Next button.
- In the Move configuration page, provide the migration batch name
- Now start the batch process data conversion
Step VI: Update DNS Records for Conversion
- Access the Admin centre and then press the Settings option
- Access your Domain and then choose your domain name.
- After that, add MX Records to your DNS. It is how the data is converted from Gmail to Office 365.
You can also read How to Export Gmail Emails into Local hard drive
Method 2: Automated Conversion from Gmail to Office 365
Manual conversion methods are not so easy to follow. It is time-consuming. It also needs technical proficiency. Conversion may involve the risk of data loss. Therefore, the best solution is to use an advanced Gmail to Office 365 converter. Since Office 365 users get the benefit of MS Outlook, we would like to suggest you use Softaken Gmail Backup Solution. It is an advanced application that exports the all-important content of Gmail to Office 365 quickly and efficiently. It is, in fact, an all-in-one program for data conversion and backup. Here are some good reasons to use the Gmail Backup Solutions.
The program is so easy to use. The process of conversion is so easy to follow. No technical proficiency is required to export from Gmail to PST. A novice can operate the tool independently.
The program is made to export Gmail to PST, Gmail to EML, Gmail to EMLX, and Gmail MBOX. Hence, it is an all-in-one application for data conversion.
The tool is capable of exporting entire Gmail folders to PST in one go. It also supports custom conversion under which selective Gmail folders are exported. For example, you can select “Inbox” to export only inbox data. Similarly, you can select the “Sent” folder to convert only sent items. Hence, the conversion results are always in users’ hands.
Here are the steps of conversion to follow while using Softaken Gmail Backup Solution.

- Before you launch and install the application, go to the Gmail settings and enable IMAP under Forwarding and POP/IMAP heading.
- After that, turn on less secure apps.
- Install and run the app, provide the correct Gmail username and password then press the tab “Connect to my Gmail account”
- The list of folders will appear with the folder name and the number of messages it contains.
- Select the folders “All Mail” or a particular folder from the dropdown
- Choose the export option “PST”
- Provide the output location to the file by clicking on the “Browse” tab
- After that, press the “Process Now” button
It is how you can achieve the conversion goal from Gmail to PST quickly and with accuracy.
