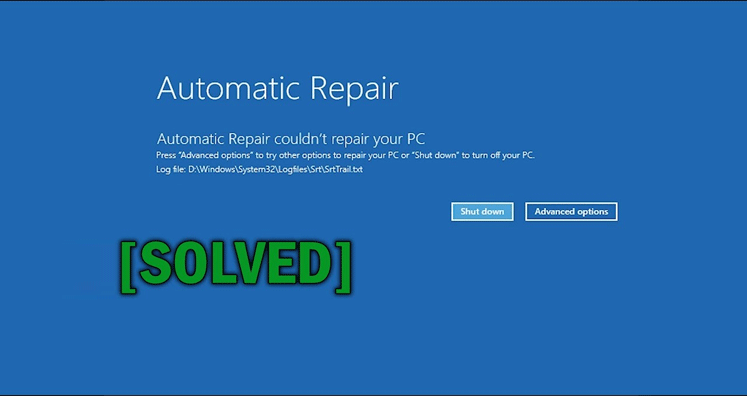
In Windows, an inbuilt tool i.e. Automatic Repair is provided to repair Windows. It has few limitations and due to which it sometimes fail to work and you get an error message ‘Windows Automatic repair not working’
To resolve this issue is a big problem for users. With this article, we have offered few solutions to get out of this error. Let us know them.
Situation 1. Automatic repair not working – No Boot Loop
If you get this message – automatic repair not working with no boot loop. Then, you can apply the given solutions to fix this issue.
Method 1. Access Boot menu options using Command Prompt
Using bootrec.exe, you can update master boot record, partition boot sector, and boot configuration data to correct boot issues on Windows. Here are the steps for this –
Click on Troubleshoot button. Go to Advanced options and choose Command Prompt from the list.

- Now, in Command Prompt, follow the commands one by one –
- exe/rebuildbcd
- exe/fixmbr
- exe/fixboot
- Run chkdsk along with exe. Chkdsk check the metadata of a drive for logical & physical errors. Try running the given commands –
- Chkdsk/r c:
- Chkdsk/r c:
- Restart your system to check whether the problem is resolved or not.
Method 2. Boot in safe mode
Using System File Checker Tool, you can resolve performance or boot-related issues. This tool will scan, detect and replace the corrupted or missing system files using Windows recovery image. SFC Tool can’t work for replacement files insider the recovery image. For this, one can use Deployment Image Servicing and Management Tool. This will scan and repair install.wim image. The steps included in this process are –
- Go to Troubleshoot. Click on Advanced options and then go to Startup settings
- Click on Restart
Now, choose Enable Safe mode with networking from the given options.

- If you face any driver issues in safe mode, then download the update driver from manufacturer’s website and save it on your external drive.
- Hold Windows + X and select Command Prompt
- In command prompt, run this command –
DISM /Online /Cleanup-Image /RestoreHealth
- After completing this process, restart your system and updated driver that you have downloaded.
Method 3. Run Windows Startup Repair
Run Windows Startup Repair to fix this issue –
- Go to Advanced options and click it.
- Choose Troubleshoot and click on Advanced options
- Click on Startup Repair button and this will start the diagnose for you.
- After this, check the results and check for the problem
Method 4. Check hardware specifications of your PC
There may be hardware issue behind endless repair loop issue. It might be possible that RAM of your computer is unable to load Windows on hard drive, may fail to handle large Windows files. You can check for hardware specifications of your system with multiple methods.
Method 5. Run System Restore
Endless Repair Loop issue can be resolved with System Restore. This issue will restrict you from accessing Windows 10 OS, you need to reboot your system from Windows installer USB drive and follow the given steps –
- Select your language and other preferences. On the screen, you find install button and on the left-side, Repair your computer button.
- Choose Windows operating system to repair
- Select System Restore
- Install Windows with point-in-time recovery
- Restart the computer and there should be no problem in opening the windows.
Situation 2. Automatic repair not working – Stuck in Boot Loop
This is the second case where you got stuck in ‘Automatic repair not working’ boot loop. Here are the solutions to fix this issue.
Method 1. Disable Early Launch Anti-malware drivers
By disabling Early Launch Anti-malware (ELAM) drivers, users can causes issues during the boot. Here are the steps to disable ELAM –
- In Boot menu, choose Troubleshoot, click on advanced options and the click on Startup settings.
- Choose Disable Early Launch Anti-malware drivers
- Restart the computer and check for the issue to resolve
Method 2. Delete Problematic files
Problematic files can cause Automatic repair boot loop issue. Hence by deleting the problematic files, this issue can be resolved. Given are the steps –
- In Boot menu, choose Go to Advanced options & then open Command Prompt.
- Enter the given command in it –
C:\Windows\System32\LogFiles\Srt
SrtTrail.txt
- This will show boot problematic files.
- Now, to delete these files, run the following command –
cd c:\windows\system32\drivers
del <Enter the name of the corrupt file with extension>
- Restart your system and check the error.
Method 3. Restore Windows Registry
A corrupt Windows registry may be the reason behind automatic repair boot loop. Here are the steps for restore your registry –
- Go to Boot menu, click on Troubleshoot. Go to advanced options and then Command prompt
- Enter the command in command prompt –
copy c:\windows\system32\config\RegBack*c:\windows\system32\config
- When asked to overwrite the files, type all and press
- Exit command prompt and restart your computer
Method 4. Disable Automatic Startup Repair
- Go to boot menu, choose to Troubleshoot then Advanced options and go to Command Prompt.
- Enter the command –
bcdedit /set {default} recoveryenabled No
- Restart your system and check for the problem is resolved.
Method 5. Reset your PC
If you still are unable to fix this issue, then reset your PC will help you to remove the installed applications. Reset option will delete installed files, settings and apps. Before you try this option, make sure to take backup of your important files.

Concluding Lines
In this article, we have explained two situations with solutions in both case for solving ‘Automatic repair unable to repair your PC.’ I hope with these solutions, you are able to fix this issue.
For any kind or Data Corruption, try Widnows Data Recovery Software
