Summary: If you are looking for a fast solution to transfer a Hostinger account’s data to an Office 365 account, you don’t need to go far. The article discusses two different ways to achieve it.
Solutions- Transferring Hostinger Emails to Office 365
In this article, we discuss a popular manual solution to transfer Hostinger to Office 365. The manual solution needs technical occupancy. Ensure that you are technically witty to handle the manual conversion.
Step 1: Connect Hostinger to Microsoft Outlook
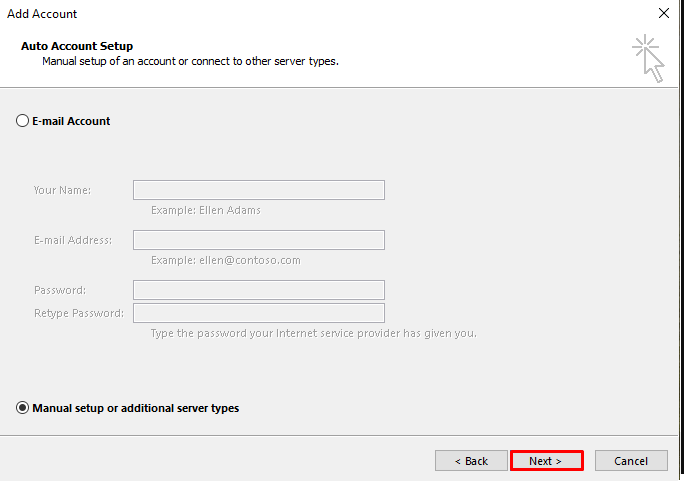
- Open MS Outlook and hit the “Next” button to resume for the next step.
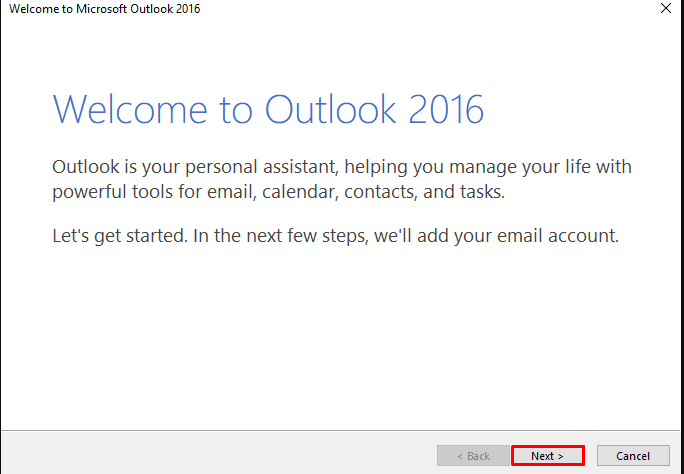
- Press the radio tab “Yes” and then “Next”.
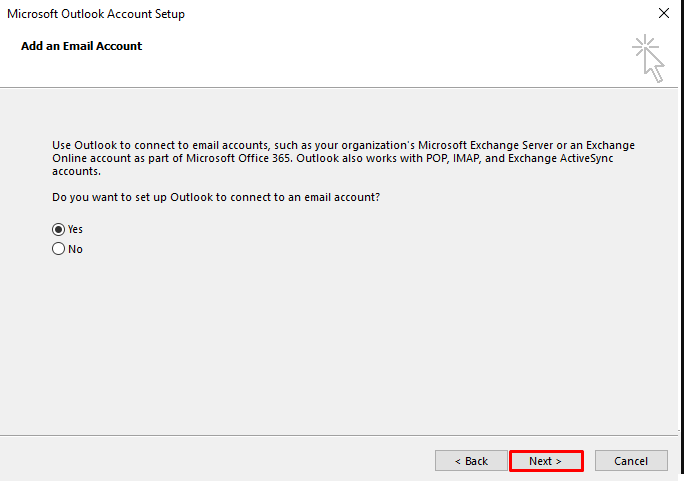
- On the “Add Account” tab, choose the “Manual setup or additional server types” option and press Next.
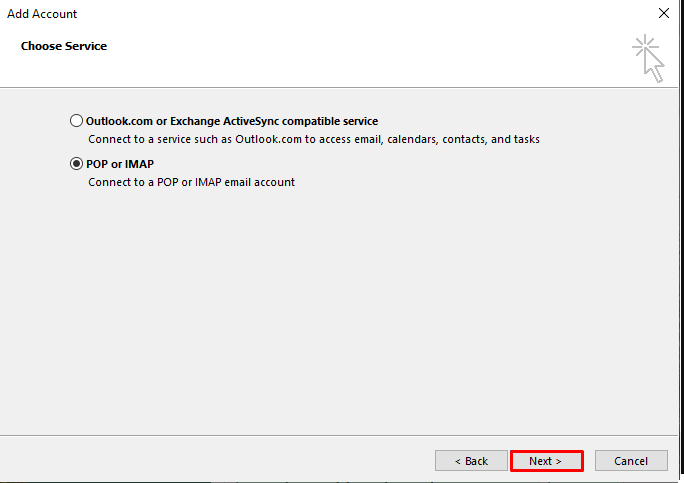
- After that, choose the “POP or IMAP” option to add the Hostinger email account to Outlook and hit the Next tab.
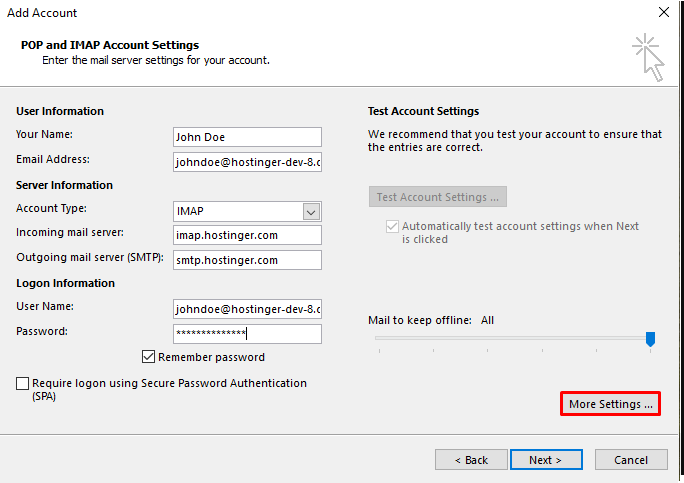
- On the new window, provide your personal information-
User information:
Your Name: Full name
Email Address: Hostinger email address
Server information:
Account Type: choose “IMAP”
Incoming mail server: imap.hostinger.com
Outgoing server (SMTP): smtp.hostinger.com
Logon Information:
Username: Again enter the Hostinger email address
Password: Its correct password
After this phase, press the “More Settings” tab and press the Next button.
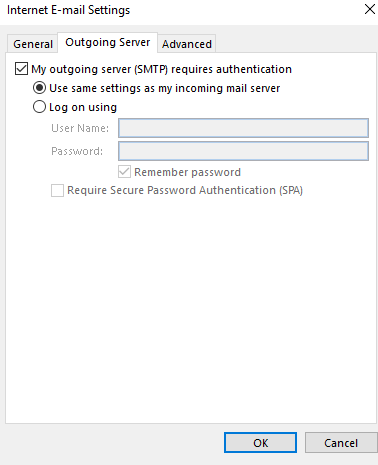
- In the Internet Email Settings window, select the “Outgoing server” tab and check “My outgoing mail server (SMTP) requires authentication” and the radio button of th “Use the same settings as my incoming mail server” option.
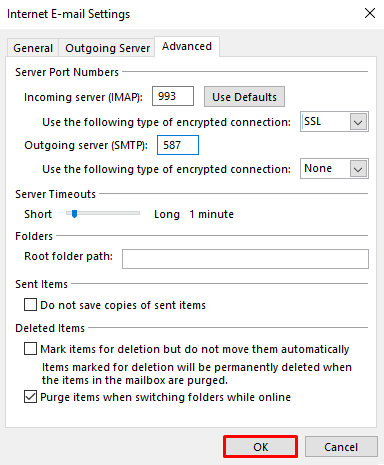
- After that, click the Advanced tab to provide the IMAP and SMTP port numbers
IMAP-993
SMTP-587
In the “Use the following type of encrypted connection” box select SSL and press OK.
- After that Outlook will automatically with the incoming mail server.
- If it is done successfully, a message would appear. Press the “Close” button to continue.

- Another window will pop up to letting you complete the process. Press “Finish”.
- Now, Hostinger emails will be inaccessible in MS Outlook.
Also Read:- Transfer emails from cPanel emails to G Suite
Step 2: Ready to Export Hostinger to Office 365
In the second step, you can export Hostinger to Office 365 without any trouble.
- Open your Outlook application and navigate the “File” menu.
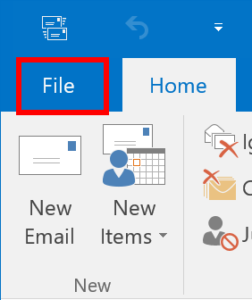
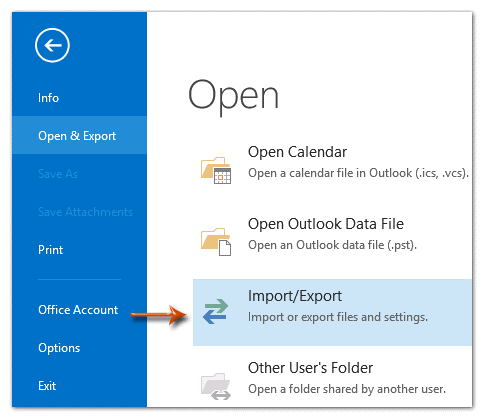
- From the Open & Export button, select the Import/Export button.
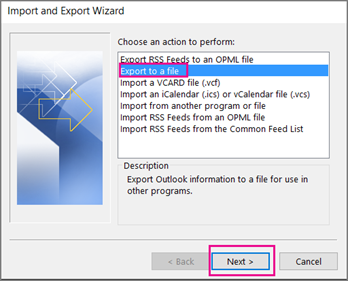
- A new wizard will open, choose the “Export to a file” option and press Next.
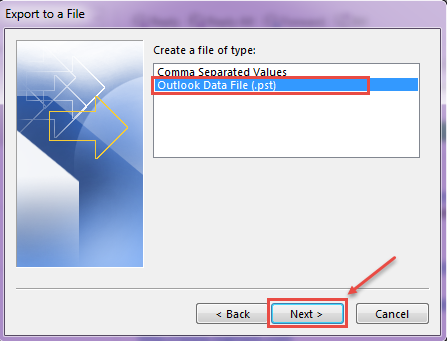
- In the Export to a File window, select the Outlook Data File(.pst) format and press Next.
- Select the location for your PST files you want to export.
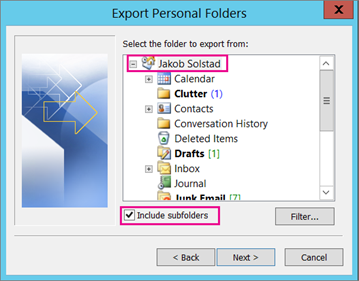
- Now, repeat the process on your Microsoft 365/Office 365 inbox.
Tips & Tricks:- Export emails from Office 365 to Outlook
Drawbacks of the Manual Solution-
- There are three major drawbacks of the manual solution.
- The manual process is not for non-technical individuals.
- If you have a range of Hostinger databases to export to Office 365, the manual process can consume time and hamper your work productivity.
- The process needs MS Outlook for conversion. If you are using Office 365 without Outlook, you cannot get the benefits.
Automated Conversion of Hostinger to Office 365
Options are many when it comes to converting from one IMAP to IMAP. We recommend the Softaken IMAP to IMAP Migration. It is an advanced application to export from one IMAP to another. The application is lightweight and easy to use. It doesn’t need technical skills to export from your Hostinger to Office 365. Hostinger webmail accounts help to keep a record of your domain emails. If you want to change your hosting service from Hostinger, conversion is the best solution.
Significant Features of Softaken IMAP to IMAP Converter
- A one-stop application to export any IMAP account data to any IMAP account in one go.
- Enable conversion in four easy steps, doesn’t need technical competency for this.
- Give users full control over results to get the desired results each time.
- Provide advanced filtration of data by filtering through folders or by the date range.
- A free demo version of the application is available to download and run
- Lifetime assistance is offered to use the app as much as you want
Steps to Run the Program for Hostinger to Office 365 Conversion
- Download the application on your system
- Select the radio button beside the “Other” option
- Provide the host, port, user name, password, and security option to hit the Authenticate Me tab

- Press the Transfer Mails option on the top of the app
- Deselect the folder manually if you don’t want to export
- Select the Office 365 radio button and then provide the details in the box to press the Authenticate Me tab

- Now, select the target folder where you want to save the file or create a new folder
- For advanced filtration, you can filter data by date

- Press the Start Transferring button to complete the process
Conclusion
Conversion with the help of a third-party solution is easy than a manual solution. You can rely on a reliable application that has garnered positive reviews and ratings.
