Working on the cloud has several significant advantages. Data safety is one of the biggest advantages where your data is safe in the cloud even if the system is corrupted or inaccessible. Office 365 is one of the most reliable cloud platforms to use. The app is easy to run. Millions of businesses have shown trust in the app. MS Office 365 is a flexible utility to use. Its advanced features avail businesses across the world.
There is a permission feature on an Exchange mailbox which is for a single account. Different users have different account permissions which are suitable for their tasks. For example, when a mailbox user leaves the office, it doesn’t mean that his account should be closed. The replaced user can use the same account. For this, the admin can change the permissions of that mailbox to give access to the replaced user. At that time, there is a need to get mailbox permission.
Mailbox Permissions in Exchange Online
The admin can permit another user to use an existing account to send, read, and create emails. Users have three types of permissions-
- They can read the emails of other users.
- They can create and send emails from another user’s account.
- They can send emails on behalf of another user’s mailbox account.
These permissions can only assign in the organization to an active user who already has an Exchange Online account. There are two different ways to grant permission.
- Use Microsoft 365 Admin Center
- Or use Windows PowerShell
Assigning Mailbox Permissions Using Exchange Online Microsoft 365 Admin Center
Go to the Admin Center to set the mailbox permissions on specific mailboxes individually. For the backup Office 365 mailbox to locally Follow the given steps-
- Log in as an Admin and press the Admin tab. Move your cursor to the Active Users –
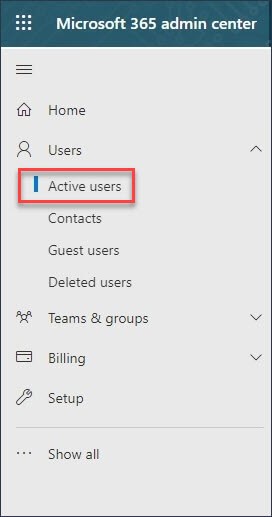
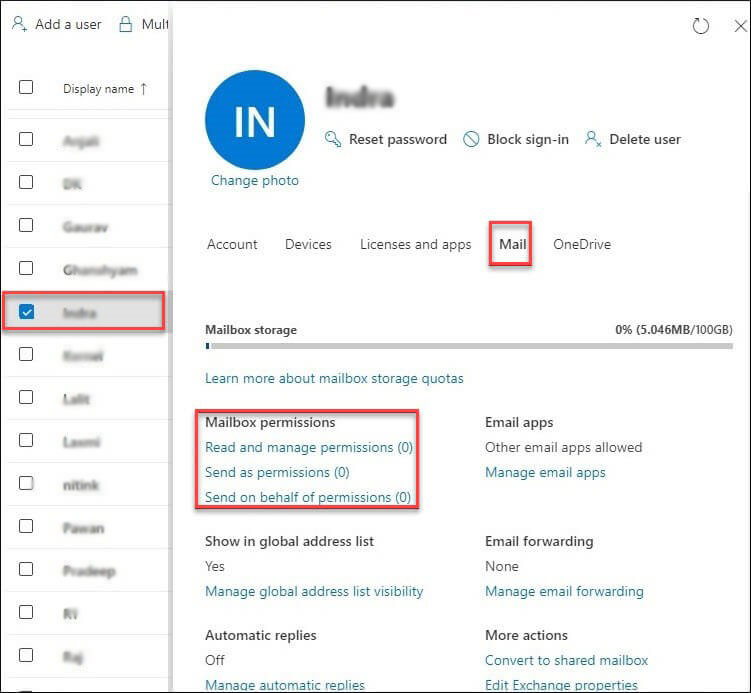
- Hit twice on the target account to access its settings. Now, from the Mail category, you can see the three permissions. Choose any one of them. Press the ‘Read and manage permissions to activate the permission.
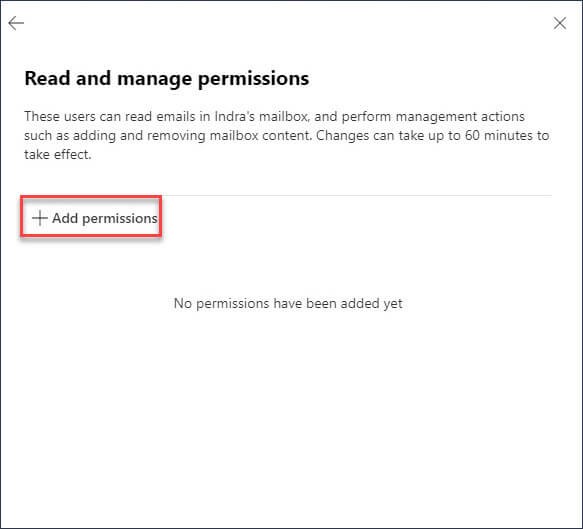
- From the new window, press the + Add permissions button.
- Now, filter the mail that you have targeted for a mailbox permission. Press the Add button.
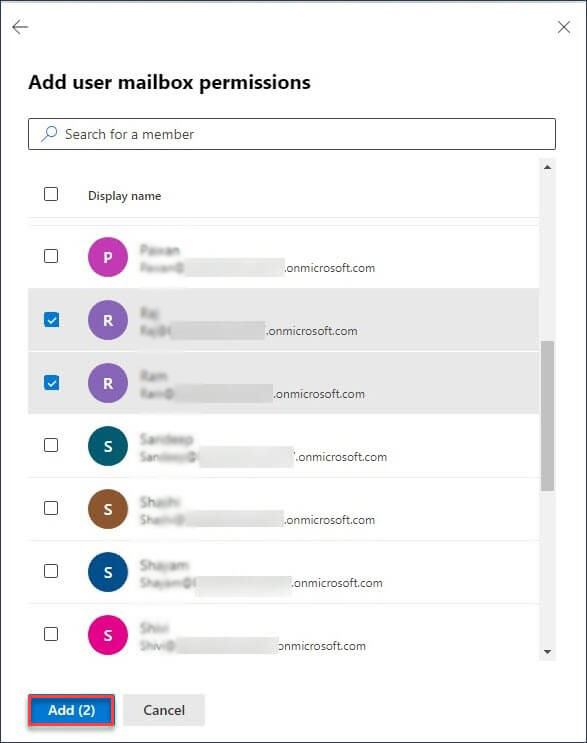
- Now, the whole changes you have made are saved. Now, the added user can read and manage the emails of the permitted account.

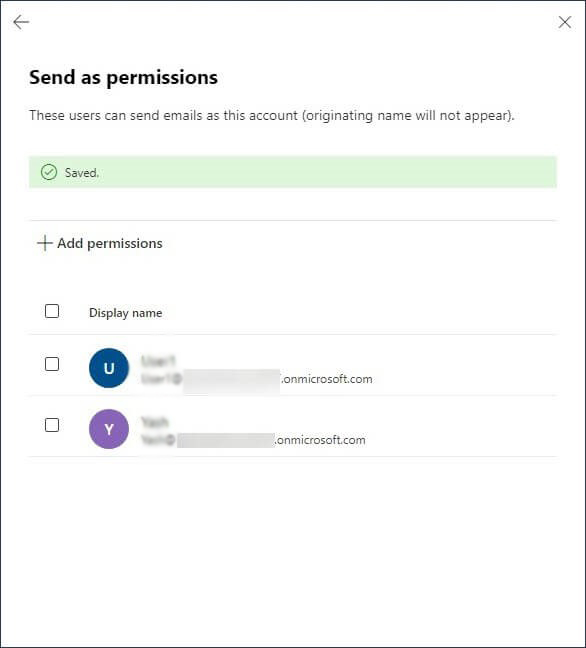
- You can follow the same step to set the ‘send as’ permissions, where the third user will get permission to send emails to another account.
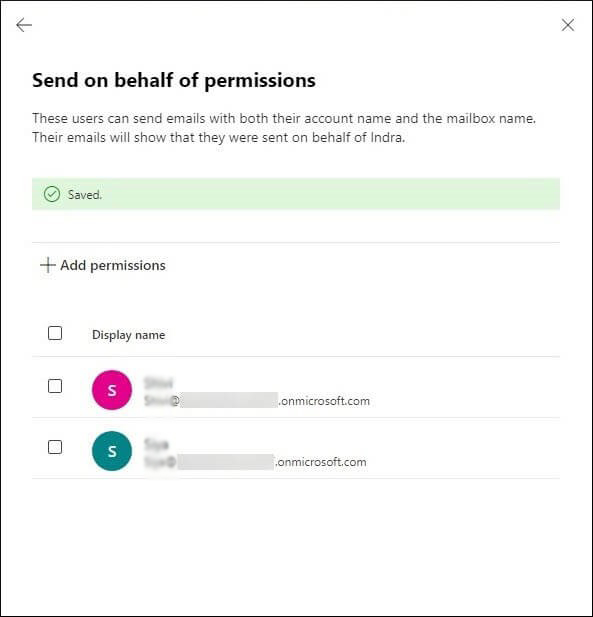
- The same steps you can follow to activate the ‘Send of behalf’ permission. It allows users to send emails from the original account and mailbox name. Such an email gives an indication that it sends on behalf of the original user.
For knowledge you may also read- Ways to Import Outlook PST to Exchange Mailbox Account
Activating the Feature in Exchange Online using Windows PowerShell
Set the command of email permissions in Exchange online using PowerShell.
- Click the link below to connect PowerShell with Exchange Online –
- Run the new cmdlet to assign mailbox permission of an account to another account-
Add-MailboxPermission -Identity “Patrick ” -User Hudson -AccessRights FullAccess -InheritanceType All
In this method, you are granting permission for “Patrick” account to “Hudson”. Do you find these above methods helpful?
Backup of Office 365 Data
Office 365 is a subscription-based application to use. You can be in trouble if your Office 365 subscription ends. However, you will be notified of this. Some users of Office 365 like to create a backup of Office 365 account data which they use a backup application because the manual backup process requires time and technical proficiency. Do you have time from your busy schedule? If your answer is no, the best solution for backup is a professional Office 365 backup tool.
Softaken Office 365 Backup free download, It is one of the best applications to use on your system. It is safe to backup up your sensitive data in a wide portfolio of file formats like PST, EML, MSG, MBOX, and EMLX. The app requires no installation of MS Outlook, Thunderbird, and others for conversion. The process of backup can start within a few minutes. In some cases, it may take around 5 minutes or less.
Some Significant Features of the Softaken Office 365 Backup Tool are –
- An independent application to handle independently
- Need no technical skills to run the application because of the interactive interface
- Keep the backup of data well-aligned and unchanged
- Requires the username and the password to connect with the targeted account
- Automatically create a log report to show the folder name and the number of messages exported
- Saves data locally to the targeted location
Steps to backup Office 365 Mailbox
- Download and run the program on the system.
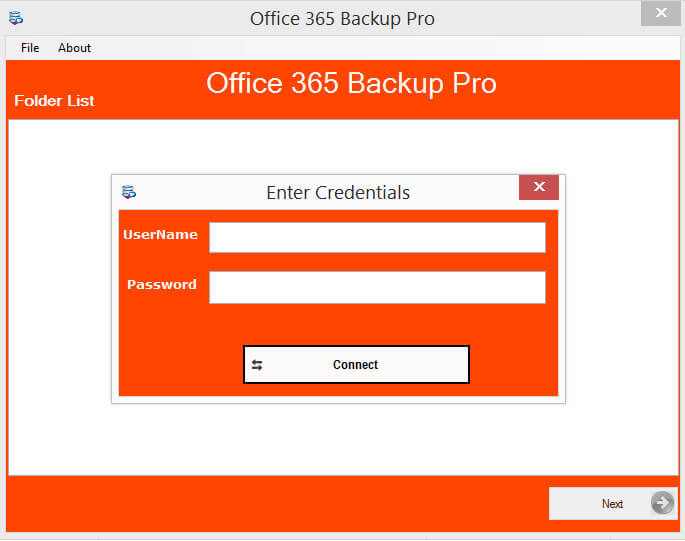
- Fill the login details of Office 365 account (username/password)
- Select the mails for backup
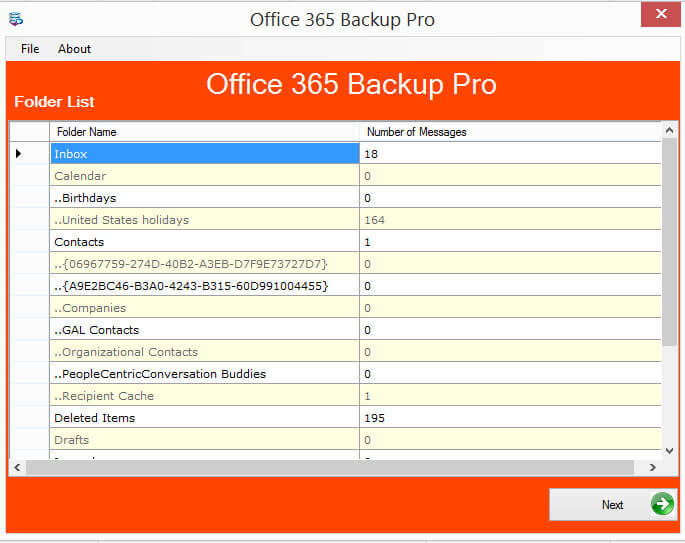
- Choose the file format which you want to store in O365
- Choose the location the save the the resultant files
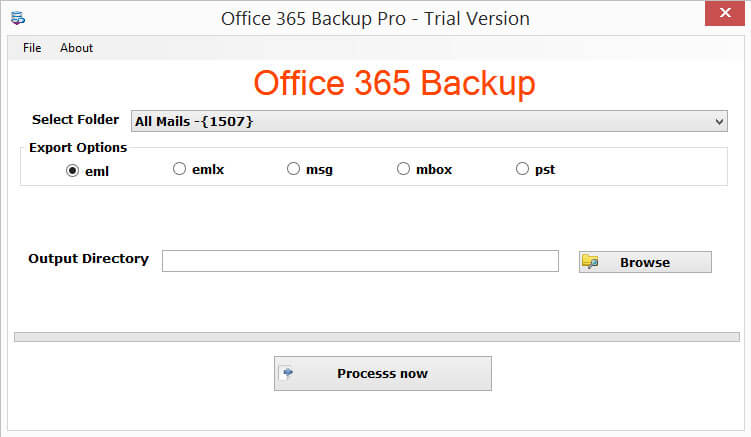
- Hit on the Process Now tab to start the conversion process.
Conclusion
Office 365 is one of the best cloud-based applications to use. However, it is a subscription-based application, so it is wise to keep its data offline for future use.
