Summary: Do you know OST files can be damaged or inaccessible more frequently than PST? With the conversion of OST, you can access OST databases. Here we have shared scenarios that make OST files inaccessible and recovery through manual and automated solutions.
Scenarios Requires Outlook OST File Recovery
- Your Exchange Server account is inaccessible and the OST file is Corrupted
- Your Exchange account is disabled (but not deleted)
- Your Exchange account is removed or deleted
Steps to Consider When Your Exchange Account Inaccessible & Damaged OST Files
Exchange Server inaccessible is a common problem. It occurs because of server crashes or unavailability. At that time, if you try to access an OST file of the same Exchange Server account, you cannot open it. The file may be damaged.
Since OST is a copy of your Exchange account, you can recreate an OST file to fix the damaged file issue.
Follow the given steps:
- Switch off your Outlook account
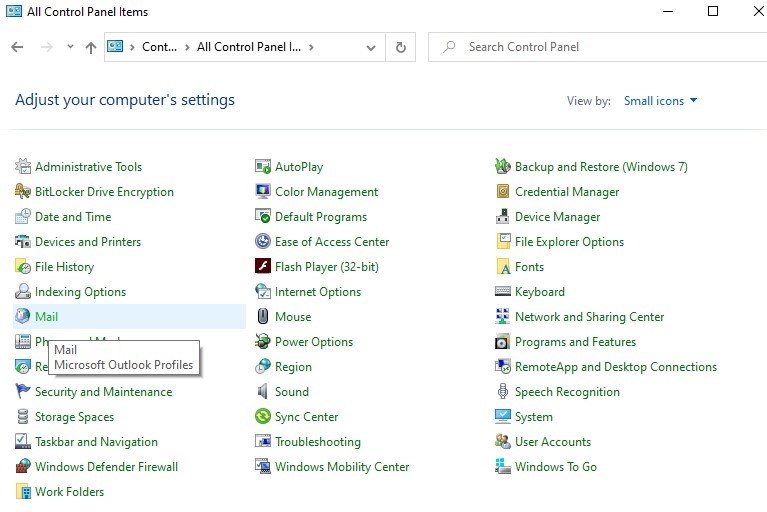
- Navigate to the Control Panel and locate the Mail icon to tape double on it.
Note: The location of Mail may vary depending on the Windows (32-bit and 64-bit) version you are using. To search quickly, use the search box of your Control Panel to locate the Mail icon.
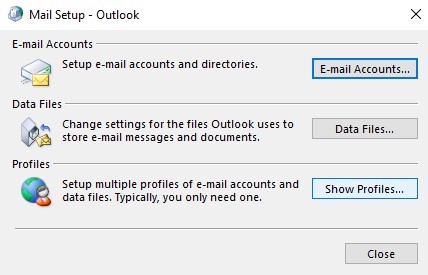
- A new window will open, hit Show Profiles.
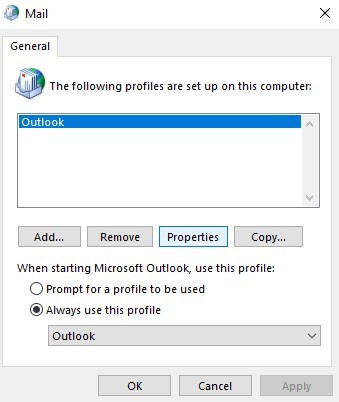
- A new window will open, choose your current Outlook profile and then hit Properties.
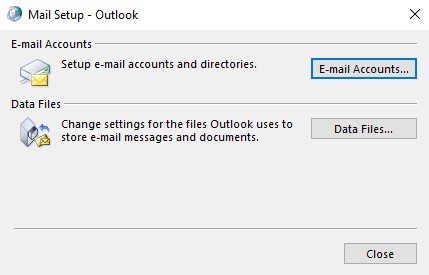
- After that, press the E-mail Accounts tab.
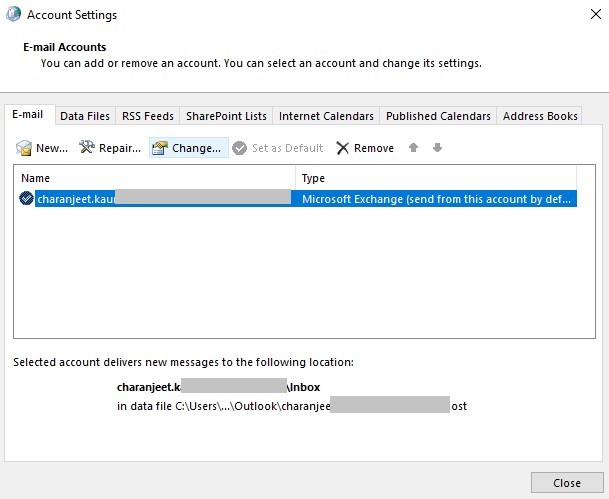
- In the next window, choose your account, and hit Change.
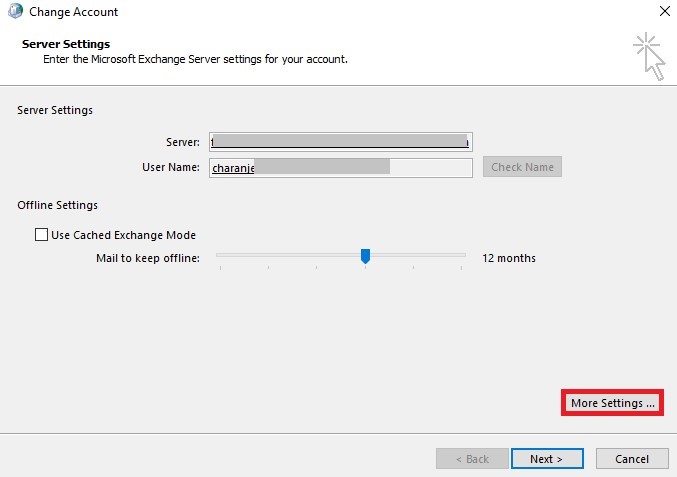
- Uncheck the ‘Use Cached Exchange Mode’ checkbox, and hit More Settings.
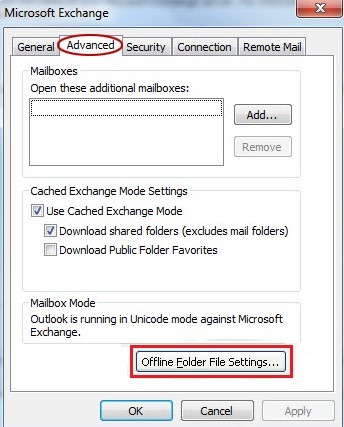
- In the next window, click on the Advanced tab and then Offline Folder File Settings.
- From the ‘Offline Folder File Settings’ window, hit Disable Offline Use and press Yes.
- Again click on the Offline Folder File Settings button, and then OK.
- Press Yes from the pop-up box
- Check the ‘Use Cached Exchange Mode’ checkbox on the ‘Cached Exchange Mode Settings’ box, Press OK and then Next.
- Finally, press the Finish tab
- Now, you can see the re-created OST file.
Also Read:- Extract attachments from Outlook PST files
Note: If the file is not re-created, the following file may have corruption. You can use the built-in feature ‘Inbox Repair Tool’ or ScanPST.exe to repair damaged OST files or use a third-party program like Softaken OST Converter.
Steps to Consider When Disabled Exchange Account (but not deleted)
If your Exchange Account is disabled, you have hope to recover your OST data by exporting OST. For this, you can use the ‘Import and Export Wizard’ in Outlook.
Note: The below steps can vary depending on the Outlook version.
Export OST for Outlook 2019/2016/2013 Versions
- Open MS Outlook, navigate to File, and move the cursor towards Open & Export, and then Import/Export.
- Among various options, choose Export to a file and hit the Next button.
- In the ‘Export to a File’ wizard, select Outlook Data file (.pst) and hit Next.
- From the ‘Export Outlook Data File’ window, select a specific folder and check the Include Folder box.
- Press the Browse tab to direct the local location to save the new PST file and choose any option from the given options. Press the Finish tab.
- As the step is successfully complete, OST data will be exported to PST.
Steps to Consider When Deleted Exchange Account
If your Exchange Server account is deleted permanently, OST files become corrupt and orphaned. You cannot access these files. At that time, you have no manual options to consider.
You require a third-party conversion program like Softaken Microsoft OST to PST Converter. The tool is also suitable for the above two scenarios. It recovers OST data into PST quickly. During conversion, the data is not modified. The tool has received positive ratings from its users. Softaken is one of the oldest Outlook third-party providers. The online store has helped a number of Outlook users by providing problem-solving applications. You can trust the platform to get the license of professionally designed Outlook applications.
Steps to Run the Program
- Download and configure the app to launch it.
- Browse and select OST files from your local folders
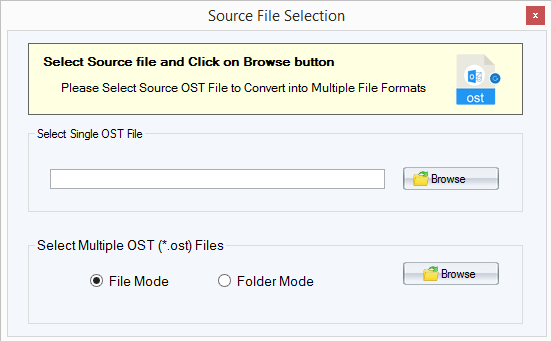
- Select the export type- Attachments, Email Address, Calendars, or Contacts
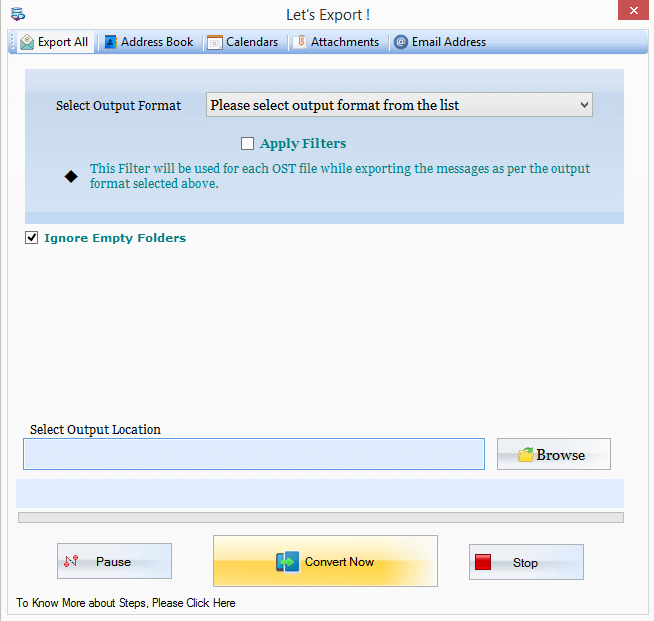
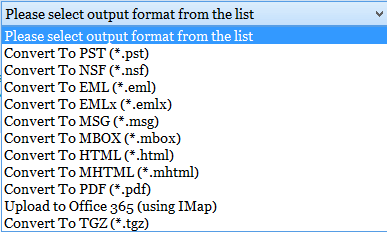
- Choose a suitable file extension and Apply Filters
- Click on the Browse button select output path and press the “Process Now” tab

Conclusion
We hope that the above situations and solutions you may find helpful. If you find them helpful or you have any queries regarding Software, you can share your thoughts in the comment box. We feel happy to hear from you.
