Exchange Server is a popular platform to maintain or store data. The striking quality of Exchange Server is its integrity with a Hybrid system to help transfer data from Exchange Online to Office 365. The Hybrid system makes conversion from Exchange Server to the cloud storage easy. It offers other advantages also if on-site servers like journaling are installed.
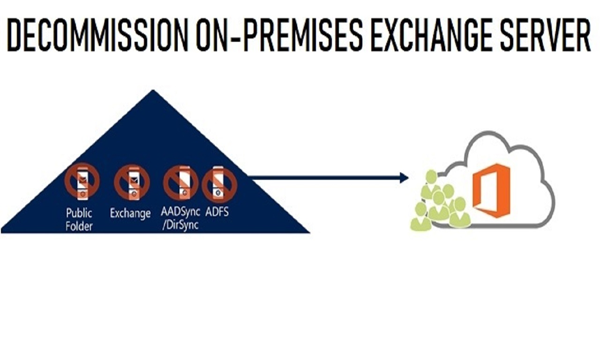
The article shares about neutralizing a local Microsoft’s email after exporting all the mailboxes to MS 365. Looking at the situation, we can take help from an Exchange Server, a local Active Directory Server, and a file server. It holds the Azure AD Connect app to synch users with their passwords. Holders of MS Office 365 have the legal right of 365 Business Essentials with the authority of EMS E3 which helps in synchronizing passwords. Hence, all mailboxes are exported to Office 365 and now users can look for further steps. All the file server data is exported to SharePoint Online and Teams. Hence, the Active Directory has decommissioned all the systems that will manage and configure with the Azure Active Directory.
Step 1: Public folders
If you are using Public folders, it must be switched instead of marking it Remote. In case, they get the mark of Remote, you will not able to use them. If you like to use Public Folders continuously, it is good to switch folders to cloud storage. The system of conversion is not going to be easy. It will be difficult to get them with batch conversion to export legacy public folders to public folders or MS Teams.
Changing the DNS records
Once the Public folder problem is sorted, the second step is changing the DNS records to point to the cloud storage. It is how the new emails will send to the cloud. We recommend you proceed with the step on weekends because it consumes time. It will make sure that you are not ending up sending some emails to the cloud and the locally stored Microsoft email. As the MX record and Auto discover DNS entries are changed online, you need to ensure that all the entries of DNS have changed from the locally Server DNS.
Since Microsoft’s email service needs the assistance of the Service Connection Point (SCP) for mailing, it will not be enough to change the entries of DNS. You may require changing the values in the Exchange Server. It will help the Active Directory to pass auto discover requests to Exchange Server. Here are different commands to follow for different Exchange Server versions.
For 2010 and 2013 Exchange Server
Get-ClientAccessServer | Set-ClientAccessServer -AutoDiscoverServiceInternalUri $Null
For 2016 and other Upgraded Versions of Exchange Server
Get-ClientAccessService | Set-ClientAccessService -AutoDiscoverServiceInternalUri $Null

- As you log in to the cloud account through the Admin mode, press the Exchange Admin tab.
- As you log in to Office 365 through the Admin mode, press the Exchange Admin tab.
- After that, press the Mail flow tab and then Connectors.
- This step requires the removal of existing connectors associated with the Hybrid setup. But, don’t remove connectors from multi-functional device or scanners.
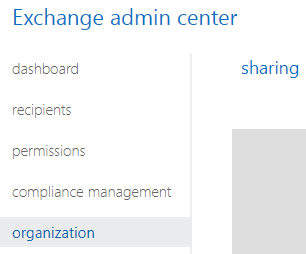
- After that, press the Organization tab and next hit the Sharing button. Replace the organization name from Office 365 to On-Site that is associated with a GUID.
- In case, Configuration of the Hybrid setup with OAuth is done, it needs to be cleared. You can leave the step if it is not configured with OAuth.
On your local Exchange Server, get ready to run the command.
Get-IntraorganizationConnector -Identity ExchangeHybridOnPremisesToOnline | Set-IntraOrganizationConnector -Enabled $False
For your Exchange Online PowerShell, this command will work-
Get-IntraorganizationConnector -Identity ExchangeHybridOnlineToOnPremises | Set-IntraOrganizationConnector -Enabled $False
Once these above steps are done, get ready to remove both outbound and inbound that the Hybrid Configuration box has developed. They can be used for redirecting emails from the local Exchange Server.
Disable the directory synch going between the local Active Directory and the tenant
Looking at the abovementioned title, you may get the idea for the next step. The following steps are essential for the management of your identities from the Office 365 portal. While you are removing the Azure AD from the on-site, follow all the steps carefully else your identity can be deleted. Let’s find the steps to follow. The foremost step is to connect to the cloud tenant using PowerShell. After that, give an order to stop the synchronize feature with the below-mentioned command.
Set-MsolDirSyncEnabled –EnableDirSync $False
It is how you can delete the Azure AD from your server. Once it is done, you can look for the uninstallation process of the local Exchange Server.
After this step, there will be nothing left to extract and save to PST except the backup of your EDB file. In case, you fail to transfer the data from your Exchange Server, there is no manual way of restoring the whole Exchange Server. It would be a challenging task for the admin department.
EDB to PST Converter can help you. It is one of the most reliable methods to export from ED to PST effortlessly. The conversion tool makes the process of migration straightforward. Hence, nontech savvies can also operate the application. For performance, the tool has ranked 4.5 out of 5 by most of its users. It is a reliable program that offers bug-free conversion from EDB Mailbox. It is easy to run the program on your Windows device. It doesn’t need the pre-installation of MS Outlook or other applications to export data. It is a standalone application. Conversion from Exchange Server to Outlook can be possible as much as you desire after getting its licensed version. Download the free trial of the application on your Windows system.
