Office 365
Installation & Configuration of Lotus Notes 7.0
Lotus Notes has several versions, among them the version 7.0 is widely used. It is simple to operate and install the app.
Let’s discover the steps of installation and configuration!
Step 1– Installation
Press the tab ‘Download Lotus Notes‘ to install the software.
Now run the self-extracting file Notes7.exe to create a directory, C:\Lotus7. (HINT: A Win Zip S elf-Extractor wizard will open. Press the tab ‘Unzip’. While the files have been expended press ‘Ok’ and press ‘Close’.)
Now start setup.exe from the extension C:\Lotus7\Clients\W32Intel\folder
Now press ‘Next’

Step 2
A new wizard ‘License Agreement’ will open, first checkmark the option ‘I accept terms’ and then click on ‘Next’

Step 3
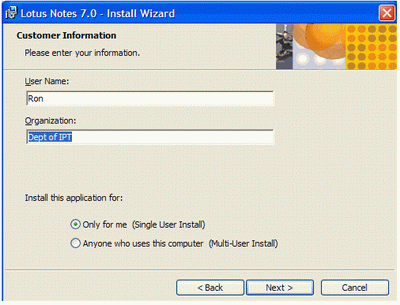
Now provide the desirable user name and your organization name. Select any one suitable option. To maintain privacy, choose ‘Only for Me’ and hit the tab ‘Next’

Step 4
The wizard shows the default installation path. If you wish changing the path, you can. Click ‘Next’

Step 5
Press ‘Next’ to accept the default features

Step 6
Keep the thing in your mind that the box ‘Makes Notes My Default Email Program’ is not marked. Now press the button ‘Install’ to start the installation process.

Step 7
This is the final wizard of installation. Press ‘Finish’ tab to complete the installation task

Configuration of Lotus Notes 7.0
Step 1
Launch the app by selecting Start>Programs>Lotus Applications>Lotus Notes. A new screen will open that looks like the below picture. Press the tab Next

Step 2
The new wizard will ask you to provide ‘Your Name’ and uncheck the option ‘connecting with Domino Server’ and then click ‘Next’

Step 3
In this step carefully watch out that no box should be checked and then press the tab ‘Next’

Step 4
Click the button ‘Ok’ while the setup of Notes is over

Step 5
The app Lotus Notes will start which an initial page is asking users for Notes 6 Setup. Choose the last option ‘No thanks, just give me the defaults’.

Step 6
After you will get the Lotus Notes default welcome page on your PC

